Motorcycle Battery Diagnostics and Winter Storage Guide
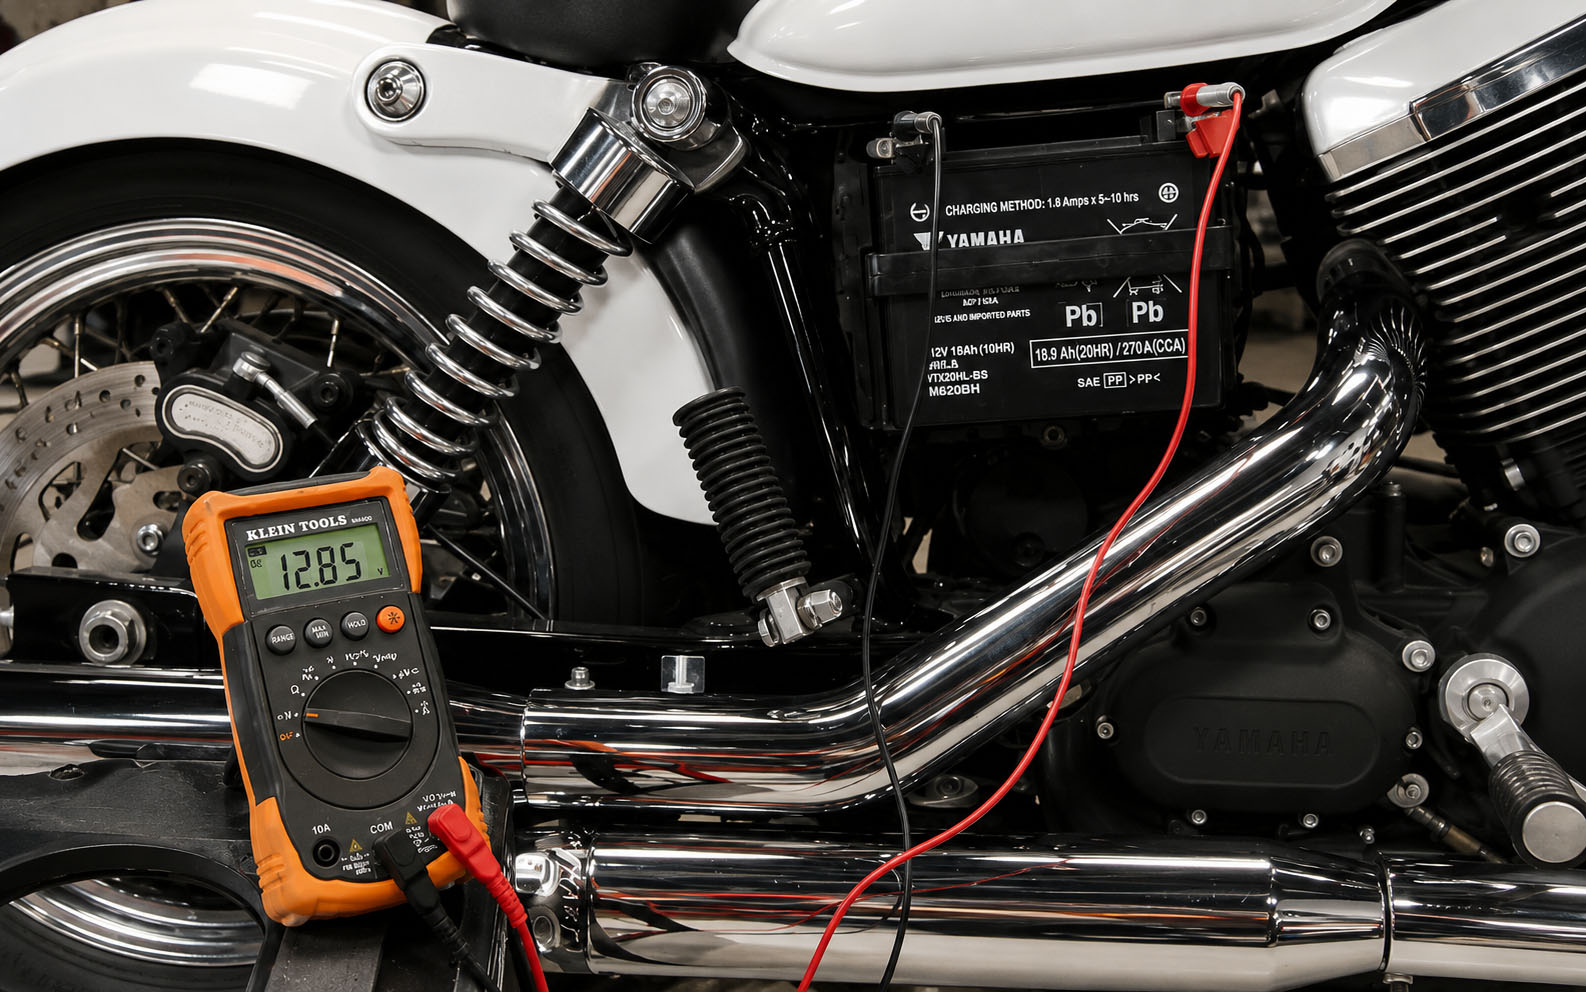
A dead battery on a cold morning is an inconvenience. A battery that fails mid-ride, cutting power to your fuel injection, ignition, and lights, is a safety event. Modern motorcycles are more electrically demanding than ever — LED lighting, traction control, quickshifters, and heated grips all draw current, and all suffer when battery voltage drops below threshold.
This guide covers multimeter diagnostics, the safe terminal removal sequence, cleaning corrosion, and smart battery maintenance through the storage season.
Understanding Battery Voltage States
A fully charged, healthy 12V motorcycle battery sits at 12.6–12.8V at rest (with the engine off, having not been charged or used for at least 2 hours). This "resting voltage" or "open circuit voltage" tells you the state of charge across all cells.
| Resting Voltage | State of Charge | Condition |
|---|---|---|
| 12.6V+ | 100% | Healthy, fully charged |
| 12.4V | 75% | Acceptable — charge soon |
| 12.2V | 50% | Needs charging |
| 12.0V | 25% | Discharged |
| Below 11.8V | Near dead | Possible dead cells |
A battery reading below 12.4V after sitting overnight indicates it's not holding charge well and may need replacement, especially if it's over 3–4 years old.
Step 1: Using a Multimeter to Test Battery Health
What You Need:
- Digital multimeter (any basic model works — no need to spend more than $15)
- Safety glasses
Testing Resting Voltage:
- Set your multimeter to DC Voltage — select the 20V range
- Connect the red probe to the positive (+) terminal
- Connect the black probe to the negative (−) terminal
- Read the display
This is your battery's resting state of charge. Anything above 12.6V with a full charge is a healthy battery. Below 12.4V after a full night's rest indicates it's not holding charge well.
Testing the Charging System (Alternator Output):
- Start the engine and let it idle
- Keep both probes in place on the battery terminals
- Increase engine speed to approximately 3,000 RPM
A healthy charging system should show 13.8–14.8V at the battery terminals with the engine running. This confirms the alternator (stator) and rectifier/regulator are working correctly.
- Below 13.5V at 3,000 RPM: Charging system fault — stator or regulator issue
- Above 15V: Regulator failure — overcharging will destroy the battery and potentially damage electrical components
Load Testing — The Real-World Test:
A battery can show a healthy resting voltage but collapse under load. For a definitive test:
- Turn on your headlight (or high beam)
- Measure voltage at the battery terminals
- A healthy battery should stay above 12.2V under load
If voltage drops significantly (below 11.5V under load), the battery has insufficient capacity and needs replacement regardless of its resting voltage reading.
Step 2: Safe Terminal Removal Sequence
Always remove the Negative (−) terminal first when disconnecting a battery. Always connect Positive (+) first when reconnecting.
This sequence is not arbitrary — it's a fundamental electrical safety rule.
Why Negative First?
The motorcycle's chassis and frame act as the negative ground for the entire electrical system. If you remove the positive terminal first, any metal tool that accidentally touches the frame while still in contact with the positive terminal creates an immediate short circuit through the chassis. This can cause sparks, destroy fuses, damage the ECU, or cause the battery to vent hydrogen gas explosively.
By removing the negative first, you break the ground connection. Now the frame is no longer part of the circuit — any accidental contact between your spanner and the frame is harmless.
Removal order: Negative (−) first → Positive (+) second
Reconnection order: Positive (+) first → Negative (−) second
Step 3: Cleaning Terminal Corrosion
White or blue-green crystalline deposits on battery terminals are lead sulfate and copper oxide — the byproducts of normal battery chemistry. Even light corrosion significantly increases electrical resistance at the terminal connection, causing hard starting, dimming lights, and unreliable electronics.
Safe Cleaning Method:
What you need:
- Bicarbonate of soda (baking soda)
- Water
- An old toothbrush
- Clean rags
- Petroleum jelly or dielectric grease
Process:
- Mix a paste of 1 tablespoon baking soda + 1 tablespoon water
- Apply the paste directly to the corroded terminals and cable ends
- Watch for fizzing — the alkaline paste neutralises the acidic corrosion
- Scrub with the toothbrush until the deposits are removed
- Rinse with a small amount of clean water
- Dry completely with a clean rag
- Apply a thin smear of petroleum jelly or dielectric grease to the clean terminals before reconnecting — this creates a barrier against moisture and future corrosion
Protect your eyes. Battery terminals can flake off corrosion particles during scrubbing. Work with your face turned slightly away.
Step 4: Winter Storage — Keeping the Battery Alive
Motorcycle batteries discharge slowly even when the bike is not in use — due to the bike's own standby electronics (clocks, alarm systems, ECU memory). In cold temperatures, chemical reactions slow, reducing the battery's ability to hold and deliver charge. A battery left discharged in freezing temperatures can suffer permanent cell damage within weeks.
The Right Tool: Smart Battery Tenders
A smart battery tender (also called a battery maintainer) is not a conventional charger. It monitors the battery's voltage and cycles between charging and monitoring modes automatically, keeping the battery at exactly 100% charge without overcharging.
Recommended brands: CTEK, Optimate, Battery Tender Plus
What to look for:
- "Smart" or "pulse" charging mode
- Desulfation mode (recovers mildly sulphated batteries)
- Automatic float/maintenance mode
- Weather-resistant casing if stored in an unheated space
Storage Procedure:
- Fully charge the battery before storage — a fully charged battery is significantly more resistant to cold damage than a partially charged one
- Clean the terminals using the baking soda method above
- Connect a smart tender via the battery terminals or a SAE pigtail connector (many modern bikes have these pre-installed near the seat)
- Leave the tender connected throughout the storage period
- If you cannot keep a tender connected (no power in storage), remove the battery entirely and store it in a heated environment, connecting the tender once a week for a maintenance charge
Checking Stored Batteries:
Even with a tender connected, visually inspect the battery once a month:
- Look for case swelling (overcharging sign — replace immediately)
- Check tender indicator lights are showing "charged/maintaining" rather than "fault"
- Verify connections are secure and corrosion-free
Battery Replacement — When to Give Up
Replace your motorcycle battery when:
- It's over 4 years old and showing any of the symptoms below
- Resting voltage below 12.0V after a full overnight charge
- Voltage collapses under load (below 11.5V with headlight on)
- Physical case damage, swelling, or leaking electrolyte
- Consistent failure to turn the engine over despite full charge
Quick-Reference Checklist
- [ ] Resting voltage 12.6V+ (engine off, 2 hours after charging)
- [ ] Charging system output 13.8–14.8V at 3,000 RPM
- [ ] Load test: voltage above 12.2V with headlight on
- [ ] Terminals clean — no white or blue-green deposits
- [ ] Negative terminal removed first when disconnecting
- [ ] Petroleum jelly applied to terminals before reconnection
- [ ] Smart tender connected for winter storage
- [ ] Battery case intact — no swelling or leaking