How to Clean, Tension, and Lubricate Your Motorcycle Chain
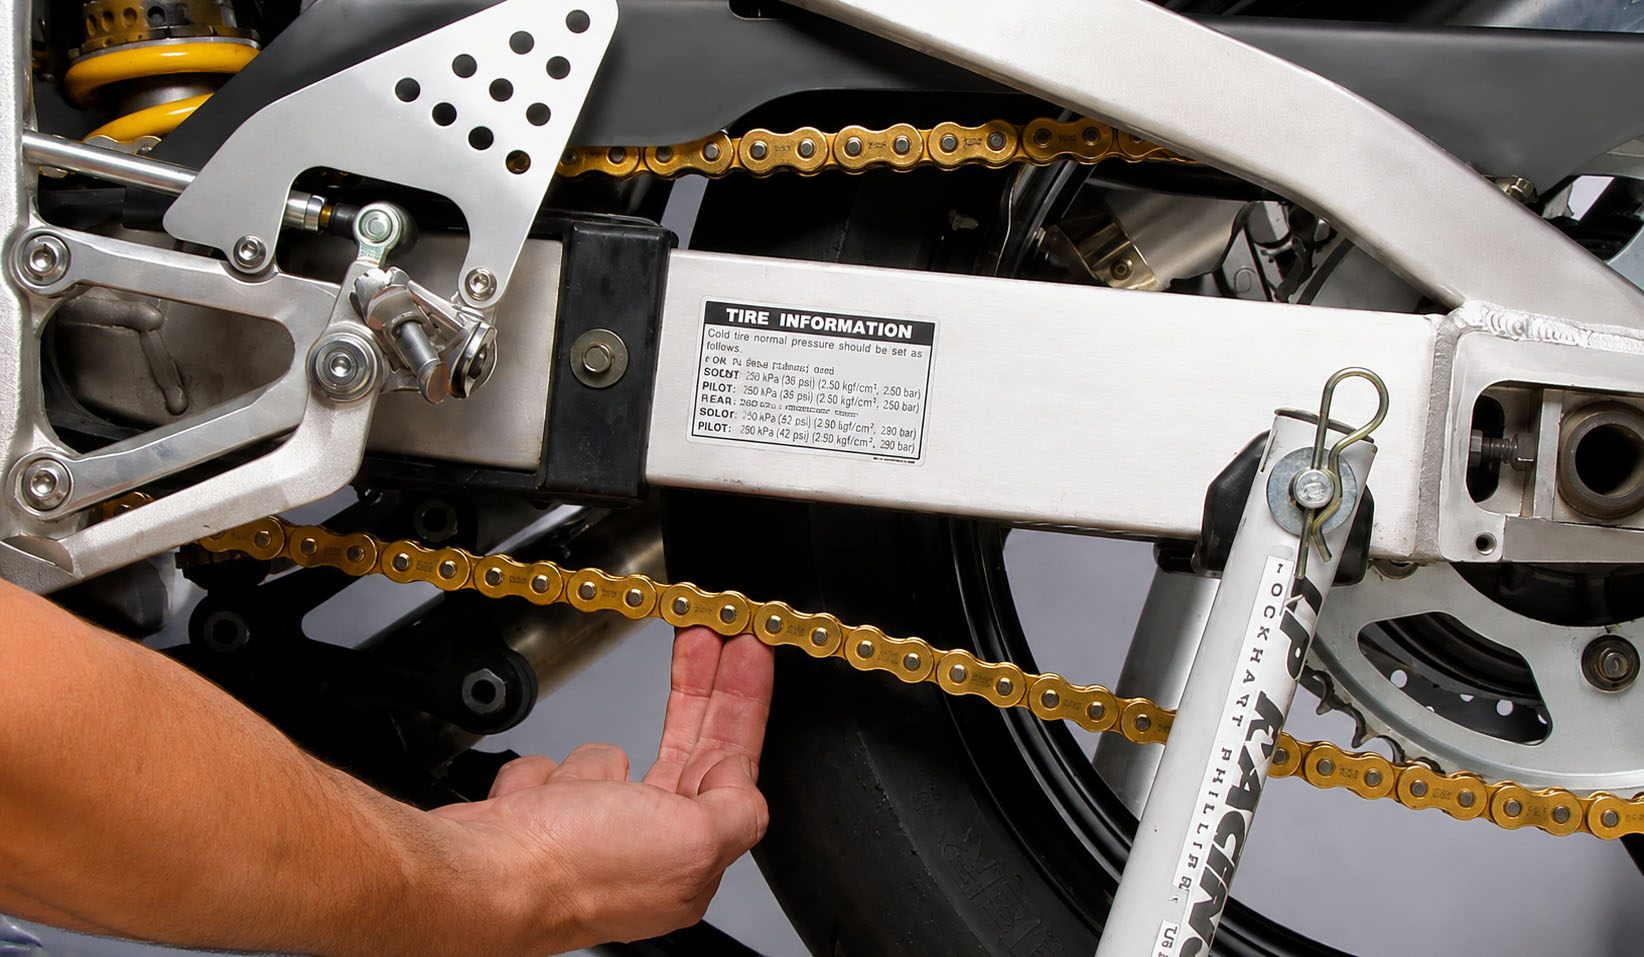
Your drive chain is one of the hardest-working components on your motorcycle. Every revolution of the engine passes through it. Neglect it and you'll face accelerated wear on sprockets, snatchy power delivery, and — in worst-case scenarios — a catastrophic mid-ride snap. The good news: a proper chain service takes under 30 minutes and costs almost nothing.
This guide covers everything: inspection, tension adjustment, cleaning with O-ring safe solvents, and correct lubrication intervals.
Why Chain Maintenance Is Non-Negotiable
A worn or poorly maintained chain doesn't just fail suddenly — it degrades gradually, stealing horsepower and punishing your sprockets along the way. A stretched chain skips teeth, causes harsh gear engagement, and creates unpredictable throttle response. A chain that snaps at speed can lock the rear wheel instantly or punch through the engine casing.
The three pillars of chain health:
- Correct tension (not too tight, not too loose)
- Clean links free from dirt and hardened lube
- Fresh lubrication at regular intervals
Step 1: Inspecting Chain Slack
Chain slack is the amount of vertical movement in the chain at its midpoint — typically measured at the tightest point in the chain's rotation.
The sweet spot is typically 25–35mm (1–1.5 inches) of free vertical play. Always check your owner's manual — adventure bikes and cruisers often run slightly more slack than sportbikes due to suspension travel.
How to Check:
- Place the bike on its centre stand or paddock stand (rear wheel off the ground)
- Rotate the rear wheel slowly through a full revolution — the chain tension changes as it rotates due to minor sprocket irregularities
- Find the tightest point in the rotation — this is your reference point
- At the tightest point, push the chain upward from below at the midpoint of the lower chain run
- Measure total vertical movement with a ruler
Warning: Always measure at the tightest point. Measuring at a slack point will give a falsely generous reading and may lead you to over-tighten — which is more dangerous than running slightly loose.
The Dangers at Each Extreme
Over-tight chain:
- Places constant side load on the rear wheel bearing and output shaft bearing
- Causes premature wear on both sprockets
- Increases risk of snapping under hard acceleration
- Creates stiff, notchy suspension action (the chain acts like a solid link between swingarm and wheel)
Too-loose chain:
- Slaps against the swingarm under deceleration, causing damage
- Can derail off the sprocket during hard cornering
- Creates harsh, snatchy throttle pickup
- Risk of jamming between sprocket and swingarm at full suspension compression
Step 2: Adjusting Chain Tension
Tools needed: Spanner for axle nut, Allen keys or spanners for adjuster bolts, ruler or chain tension tool
- Loosen the rear axle nut (don't remove it — just break the torque)
- Locate the chain adjuster bolts on each side of the swingarm
- Turn both adjusters equally — one flat at a time, alternating sides to keep the wheel aligned
- Recheck slack after each small adjustment
- Once correct, verify wheel alignment using the index marks on the swingarm (both sides must match exactly)
- Re-torque the axle nut to the manufacturer's specification
Critical: Unequal adjuster positions pull the rear wheel out of alignment, causing premature tyre wear and unstable handling.
Step 3: Cleaning the Chain
Choosing the Right Solvent
Modern chains use O-ring or X-ring seals between the side plates to retain factory grease inside the rollers. These seals are the chain's internal lubrication system — and they're easily destroyed by the wrong cleaner.
Safe to use:
- Dedicated chain cleaners (Motul, Muc-Off, WD-40 Chain Cleaner)
- Kerosene (slow evaporation, gentle on seals)
- Mild degreaser diluted with water
Never use:
- Petrol / gasoline
- Brake cleaner
- Acetone or solvent-based degreasers
- High-pressure jet washing directly at chain
Cleaning Process:
- Place the bike on a paddock stand
- Spray chain cleaner generously along the full length of chain
- Use a dedicated chain cleaning brush (four-sided brushes work best) to scrub between rollers and side plates
- Work in sections, rotating the wheel to expose fresh chain
- Wipe down with a clean rag
- Allow to dry completely before lubrication — at least 10 minutes
Step 4: Lubricating the Chain
Lubrication Intervals
- Every 300–400 miles for road riding in normal conditions
- Every 100–150 miles in wet or dusty conditions
- After every rain ride regardless of mileage
- Before any long trip
Application Method
Apply lube to the inner side of the chain (the side facing the sprocket) while slowly rotating the wheel. This allows centrifugal force during riding to distribute lube outward through the rollers.
Do not spray the outer side plates only — the lube needs to penetrate the rollers and reach the O-rings.
- Apply lube in a thin, even coat along the full chain length
- Let it settle for 2–3 minutes
- Wipe off any excess from the outer plates with a clean rag
- Avoid getting lube on the rear tyre — it destroys grip
Choosing a Chain Lube
| Type | Best For | Notes |
|---|---|---|
| Wax-based | Road riding, clean conditions | Low fling, clean |
| Wet lube | Rain, all-weather | Attracts more dirt |
| Dry/PTFE lube | Dry climates | Very low residue |
When to Replace the Chain
Replace your chain (and both sprockets together) when:
- It stretches beyond the wear indicator on a chain tool
- Individual links feel stiff or kinked after cleaning
- It lifts away from the rear sprocket when pulled outward by more than half a tooth
- The sprocket teeth look hooked or shark-finned rather than symmetrical
A chain that's replaced on time costs a fraction of a full drivetrain rebuild caused by running it to destruction.
Quick-Reference Checklist
- [ ] Check chain slack every 500 miles or monthly
- [ ] Lube every 300–400 miles or after rain
- [ ] Full clean every 1,000 miles
- [ ] Inspect sprocket teeth for wear at every chain change
- [ ] Replace chain and both sprockets as a set